Setting up product import to CS Cart
In this article we will explain how you can use native and powerful CS Cart product import feature and import products from Wise2Sync.
![]()
Use following steps to setup product import from Wise2Sync App to your CS Cart store.
1. Create export profile
Login to your account at app.wise2sync.com and navigate to "Export profiles". Click "Add profile" in the top right corner and select "Basic V2 (XML, CSV or JSON)" exporter.
2. Setup general preferences
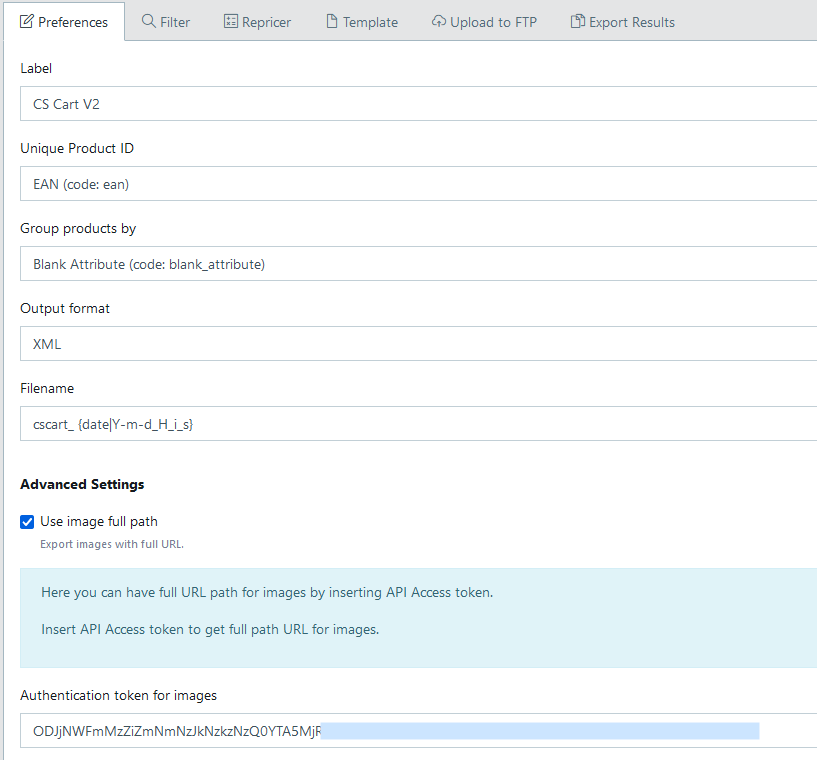
Name your export profile, select main preferences. In this example we will use output format XML (CS Cart can also accept other formats like CSV as well). You can read more about Preferences tab in this article.
Important part here is to include full image paths in the export file. Select "Use full image path" and enter one of your Access tokens (left menu Tools → API Access Tokens).
3. Setup export Template
CS Cart has a built in field mapping feature which comes handy when mapping Wise2Sync fields to CS Cart fields. Add some elements to the template:
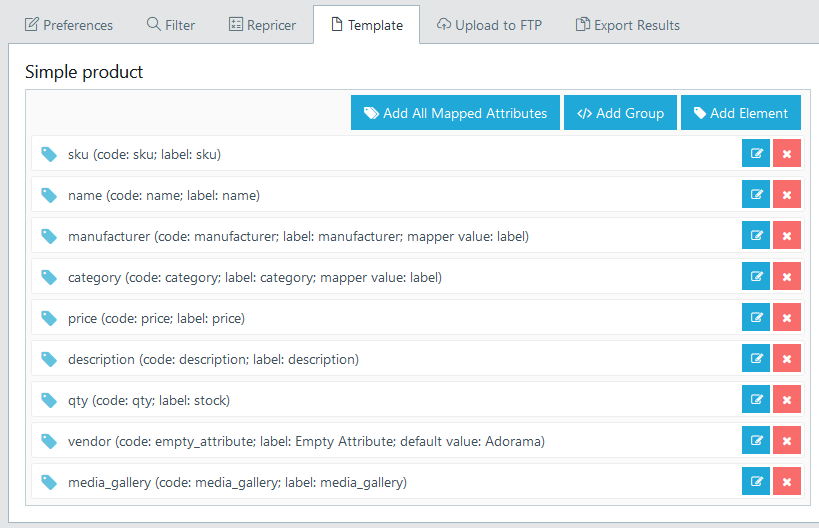
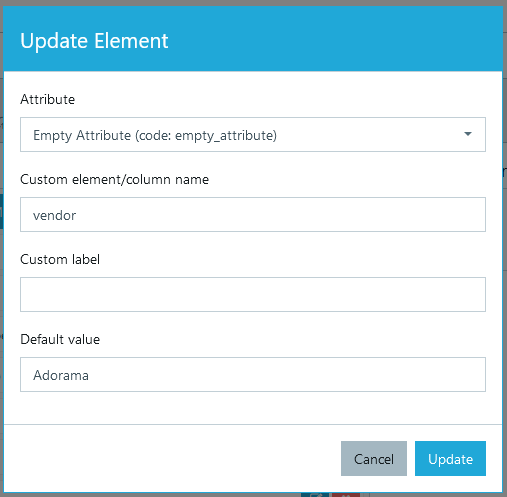
As always, you can add as many mapped attributes in the export template. CS Cart requires "vendor" field to be present in the XML file. For this you can create a dynamic attribute or just use a blank attribute like we did:
We've skipped settings in the product filter tab. As always, when testing we recommend to filter some products and do not perform test imports with full / large catalogs.
4. Create download link
After you've created your export profile and assigned some repricing rules - you need to run the export profile (if your have an "auto" type export profile - it will be executed automatically on certain time slots).
Once export profile turns back to "Completed" status, your export file is ready (to double check - open your export profile and navigate to "Export Results" tab. There you should see one or more files.
Tip: if export file size is a few kilobytes - it might be that no products were exported. Open and view the export XML file to verify this. Most likely, you will need to adjust filtering options to include more products.
Last step is to create a download link. Read this article here how to do it. It would look similar to this:
https://app.wise2sync.com/api/exporters/..../results/latest?access_token=YTc0M2E2MDAyZTg0MTQ0MTVlYWJjN2Q2M......Save this link - you will need it in CS Cart administration panel.
5. Set up product import in CS Cart
Login to your CS Cart admin panel and navigate to Administration → Import data → Products. You can find more information how to set up product import on their help page: How To: Import Products and Product Data.
Create new import and apply following settings:
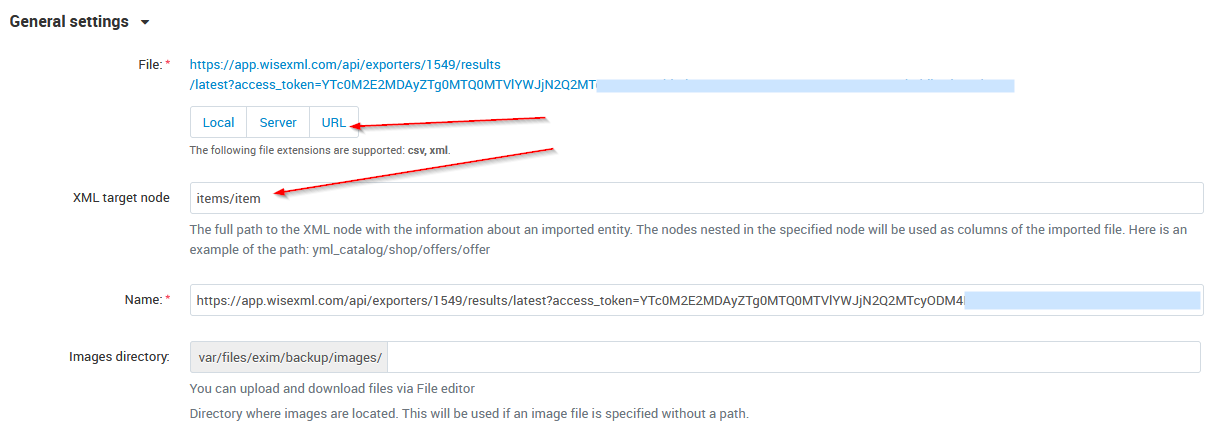
URL: use the one you generated in Step 5.
XML Target node: "items/item"
6. Map fields in CS Cart
Fields mapping in CS Cart is standard. We used such mapping as an example:

Save your settings and perform a test import in CS Cart. Your new products should be imported!