Importing Tags to your WooCommerce
Wise2Sync WooCommerce connector has the functionality to add tags to your product in the WooCommerce. Below you can find three steps, how to manage your Wise2Sync Export profile for importing tags.
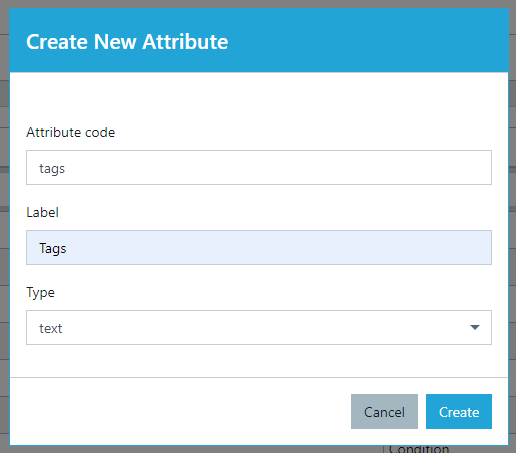
1. Create a new Dynamic Attribute.
In your Wise2Sync account, create a new Dynamic Attribute. More information about Dynamic Attributes here.
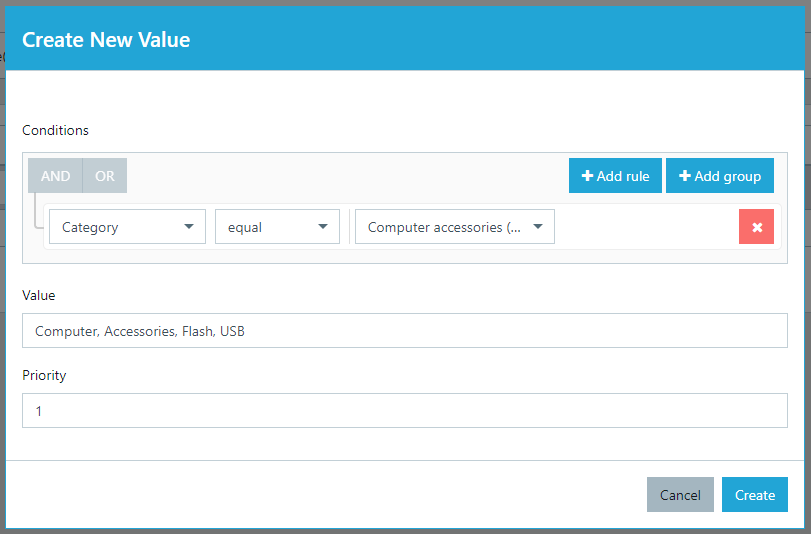
After creating the "Tags" attribute, add value, and conditions for those tags.
In the Value field, write all needed tags separated by comma or semicolon. The tags can start with the lower-case or upper-case. Add as many tags as you need. Tags will be sorted to WooCommerce in alphabetical order. If you need tags for a few categories (or conditions), create as many values as you want.
2. Edit your Export profile
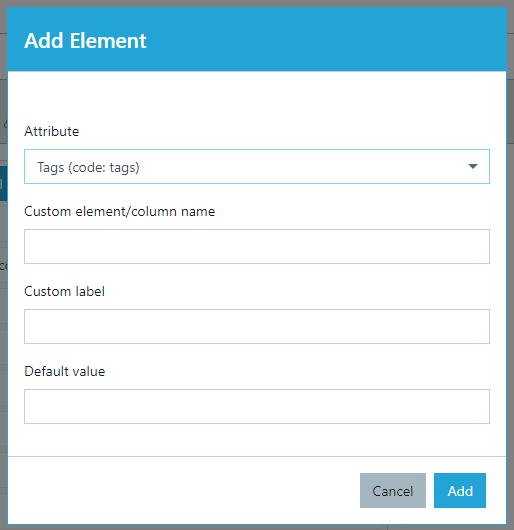
Go to Export Profiles → Select your export profile → in the Template tab add a new Tags element:
When you add the "Tags", you can Save your Export profile. More information about Export profiles here.
3. Import your products to WooCommerce
The last step is to start the import of your products into WooCommerce. Once the import is complete, your products will have Tags.
Note: when you want to edit uploaded products in WooCommerce choose Import mode: "Create new and update existing products".
-1-(2).png)


