Importing product tags
Shopify is a powerful platform, which has the possibility to generate Collections (categories) dynamically based on tags. Wise2Sync app imports Tags and then uses Shopify features to assign products to collections.
Let's say, the supplier provides detailed product categories which hold valuable information. An illustrative example (this is Matterhorn Wholesale categories) would look like this: if the product belongs to a category "/MEN/Men`s Underwear/Bathrobes & Pyjamas for Men", then assign products with these tags: "Bathrobes, Pyjamas, Men".
|
Supplier Category |
Comma separated Tags |
|
/MEN/Men`s Clothing/Sweatshirts, Sweaters & Jumpers for Men/Cardigans, Pullovers, Turtlenecks for Men |
Cardigans, Pullovers, Turtlenecks, Men |
|
/MEN/Men`s Underwear/Bathrobes & Pyjamas for Men |
Bathrobes, Pyjamas, Men |
Follow the instructions below on how to achieve this.
Step 1. Create Categories

The label field is where you enter the tags. It is important, that tags are comma separated.
You can put anything in ID field - or the same as in the Label field.
When a product belongs to more than one category - we will use the priority field to select the most detailed category. So for example, if you have the category "Clothing" (which is generic), give it a priority -10. And for very detailed categories, give something higher than -10 (in the picture above - we use 10).
Step 2. Map categories

Repeat Steps 1 & 2 for all the categories you want to map.
You can also create Tags by editing certain Dynamic Attribute.
Below you can find the three steps, on how to manage your Wise2Sync Export profile for importing tags. Check step three carefully because you will need to use different attributes depending on which way you created Tags.
1. Editing Dynamic Attribute.
After you created Shopify app Export profile Dynamic Attribute “Tags” will be created automatically. You will find the Tag attribute in Attribute mapping → Dynamic attributes list. More information about Dynamic Attribute here.
2. Assign tags/values
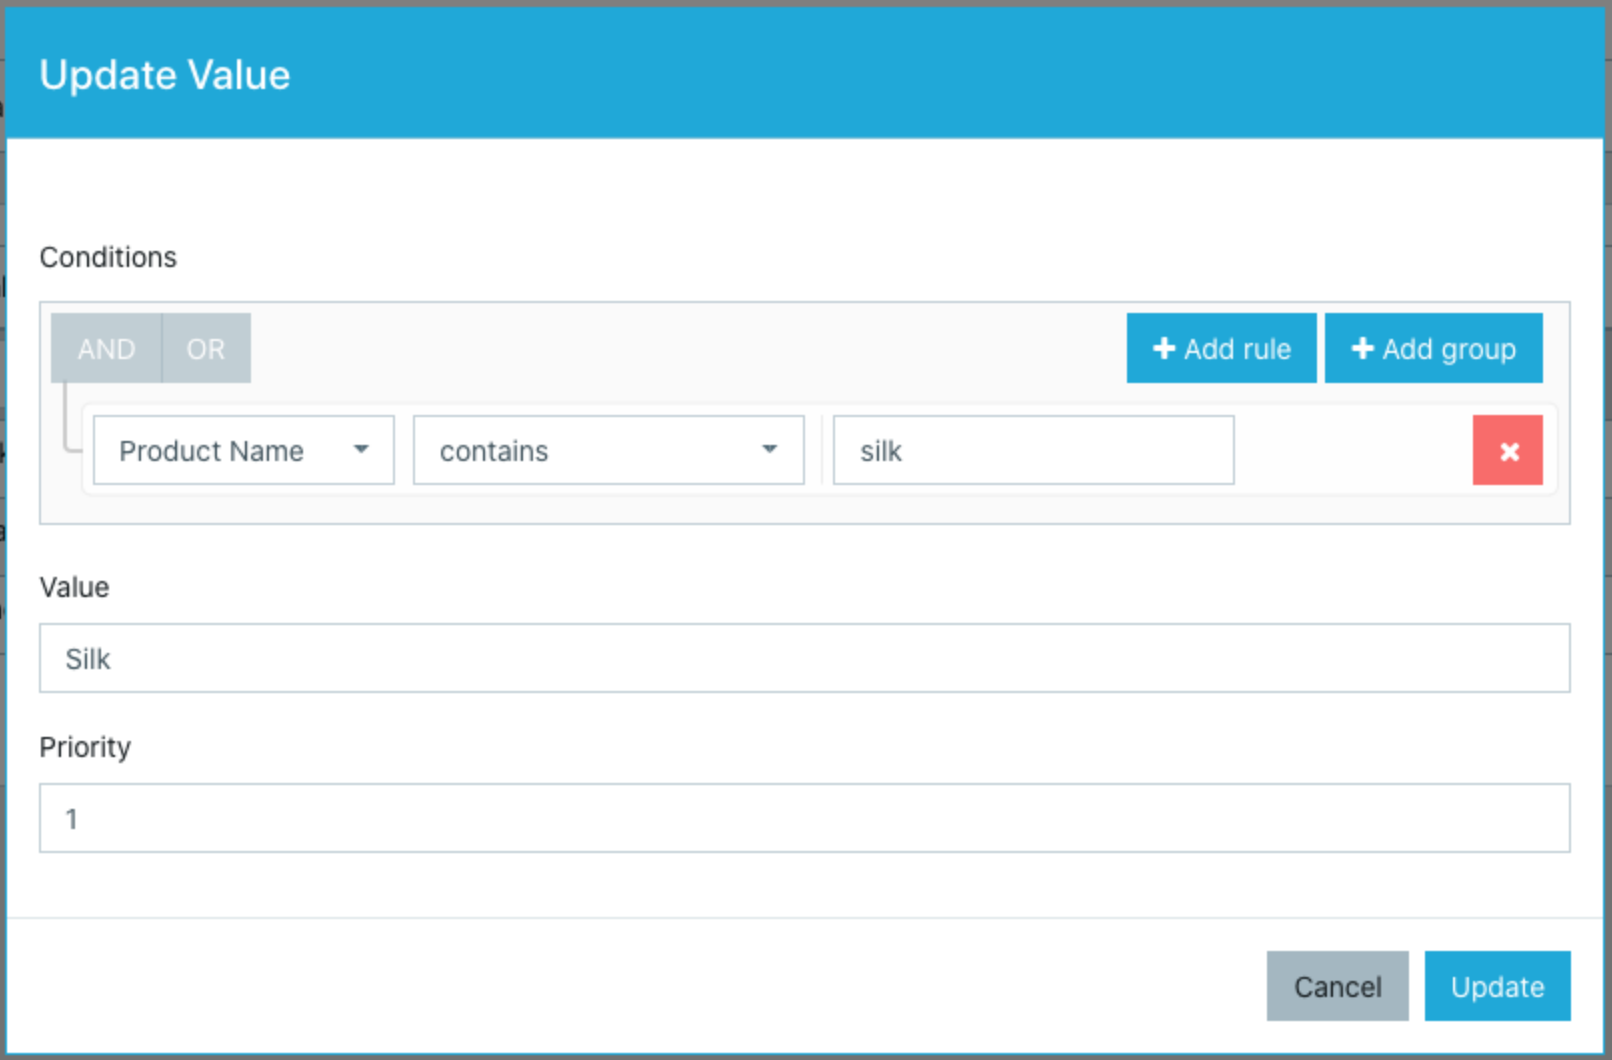
You can also assign more tags by separating them with a comma. Use more values and conditions to create as many tags as you want.

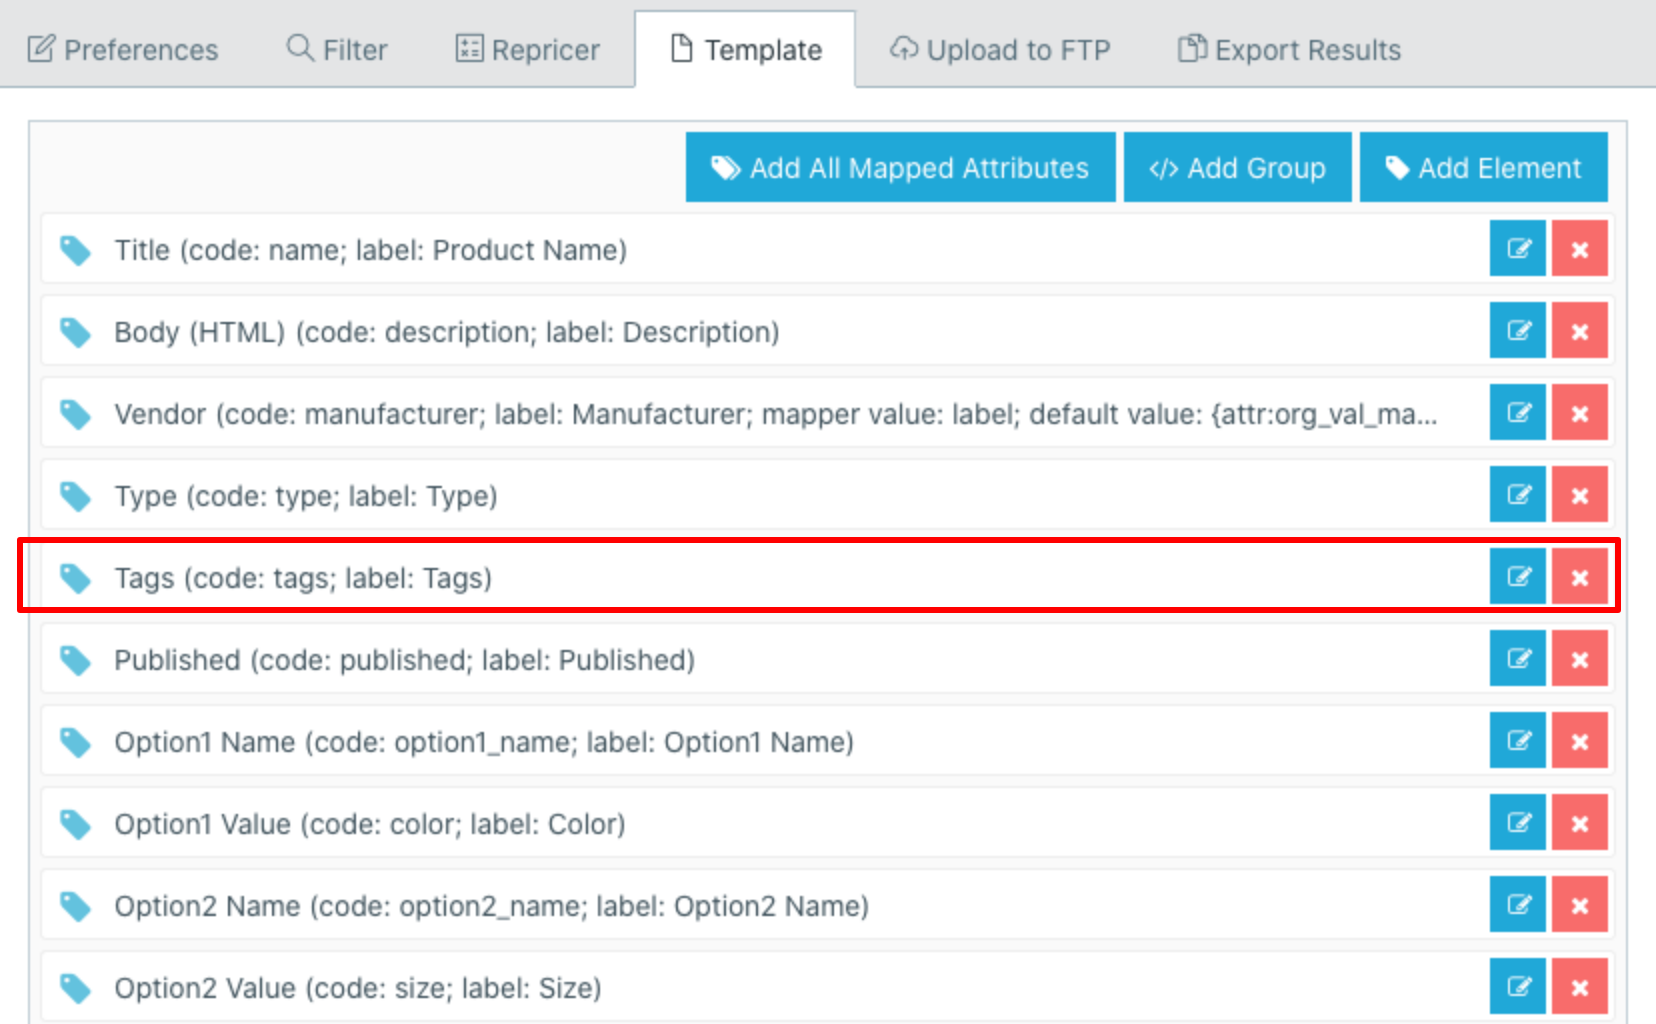
3. Check your Export profile
Before we can push Tags to Shopify, you need to make sure this data is available in the export template. Navigate to "Export Profiles" and select your Shopify export profile. Open the Template tab. If you see this line in your template, then you don't need to change anything (in case you are using Dynamic attribute for Tags).
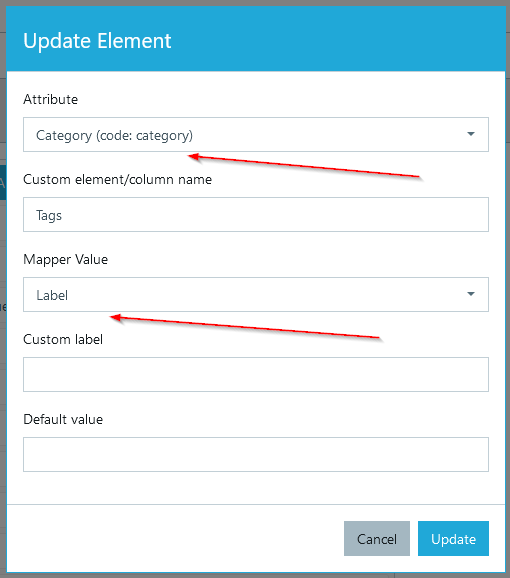
In case you converted supplier categories to tags modify the Template window like this:
-
Change the "Attribute" value from "Tags" to "Category" (attribute labels might be different in your account)
-
Set "Mapper value" to "Label"
In both cases click "Save" button in the top right corner to save the changes you've just made.
If you do not want to wait for the next Automatic Sync, use a Queue action from your Export Profiles list to start pushing new products with tags faster.
That is it!
Conclusion
From now on, when products are uploaded to Shopify, they will have Tags you used in category mapping or in Dynamic attribute:

Wise2Sync app for Shopify only assigns tags at the moment it creates new products.
This means that when our app updates existing products, Tags are not changed/updated. You can modify/translate/change/add or remove tags - your changes will not be overwritten.
If you made changes - save your export profile. More information about Export profiles here.
To make sure that tags will be adding products to the right collections on Shopify side make sure that these fields in the Collection tab are filled properly:

That's it - newly uploaded products should have product tags after the next Sync.